Developer Hub
- Introduction
- Technologies
- Nunjucks
- Bootstrap
- Git
- GitHub
- Tailwind CSS
- npm
- jQuery
- VSCode
- pip
- Netlify
- gulp
- Brand and Style
- Brand Guidelines
- Using Figma
- Logos and Assets
- Coding Conventions
- Documentation
- README.md template
- LICENSE template
gulp
Gulp is a JavaScript library that allows you to automate slow and repetitive workflows.
Gulp is used in this project to automatically convert .png files to .webp and minify our CSS and JS files.
There are tonnes of plugins out there that use gulp to help automate your workflows, if you're interested in this technology it's worth spending some time exploring these.
Installation
You install gulp as a node package in your CLI (you must have Node pre-installed on your machine), please note that you'll need to install each gulp plugin as it's own dependency package.
npm install gulp --save-dev
Example gulpfile.js
Gulp functions are run through something called a gulpfile that you create in the root of your project. Here is an example of this repo's gulpfile.js (as of the time of writing, 19th Jan 2023):
require = require('esm')(module);
var gulp = require('gulp');
var uglify = require('gulp-uglify');
var cleanCSS = require('gulp-clean-css');
var rename = require('gulp-rename');

// minifies javascript files
gulp.task('minify-js', function () {
    return gulp.src('src/js/*.js')
        .pipe(uglify())
        .pipe(gulp.dest('dist/js'));
});

// minifies css files
gulp.task('minify-css', function () {
    return gulp.src('src/css/*.css')
        .pipe(cleanCSS())
        .pipe(gulp.dest('dist/css'));
});

// converts png to webp files
gulp.task('convert-to-webp', function () {
    return gulp.src('assets/img/**/*.png')
      .pipe(rename({ extname: '.webp' }))
      .pipe(gulp.dest('dist/img'));
});

// runs all tasks via 'gulp' command
gulp.task('default', gulp.series(
    'minify-js',
    'minify-css',
    'convert-to-webp'
));
Running your gulpfile.js
Each individual 'task' can be run separately, but if you wish to run them all you simply run 'gulp' in your terminal. Please note that you should not use powershell to run this script on Sport Wales computers, use another terminal.
gulp
Netlify
Netlify is a deployment solution that we use to deploy all of our static websites, including this one!
Netlify allows us to host static websites on a URL that's accessible to the internet.
Our Netlify deployment instances are managed by Tara, please get in touch with her if you have a solution that you need help deploying.
View the documentationPython Package Installer (pip)
pip is the package installer for Python. It allows you to easily install and manage Python packages, which are reusable code libraries.
Installation
Before using pip, you need to have Python installed on your machine. You can download Python from the official Python website (Technology Solutions will need to download this on your machine for you). During installation, make sure to check the option to include Python in the system PATH.
Verifying Installation
To check if Python and pip are installed correctly, open a command prompt or terminal and run:
python --version
pip --version
This should display the versions of Python and pip installed on your machine.
Installing a package
To install a Python package using pip, open a command prompt or terminal and run:
# (remove '')
pip install 'package-name'
Replace 'package-name' with the name of the package you want to install. For example:
pip install requests
This installs the 'requests' package, a popular library for making HTTP requests.Installing a package
Listing Installed Packages
To see a list of installed packages, run:
pip list
This will display a list of installed packages along with their versions.
Uninstalling a Package
To uninstall a package, run:
# (remove '')
pip uninstall 'package-name'
Replace 'package-name' with the name of the package you want to uninstall.
Requirements File
You can create a requirements.txt file to specify project dependencies. To install all dependencies from a requirements file, run:
pip install -r requirements.txt
Upgrading pip
To upgrade pip to the latest version, run:
pip install --upgrade pip
Virtual Environments
It's good practice to use virtual environments to isolate project dependencies. To create a virtual environment, run:
python --version
pip --version
Active the virtual environment in 'myenv\Scripts\activate
Resources
View the documentationVisual Studio Code (VSCode)
Visual Studio Code (VSCode) is a lightweight yet powerful source code editor developed by Microsoft. It's the default editor for us here at Sport Wales. It's highly customizable and supports various programming languages.
Installation
Visit the official VSCode website and download the installer for your operating system (Windows, macOS, or Linux). You will need Technology Solutions to download this onto your machine for you.
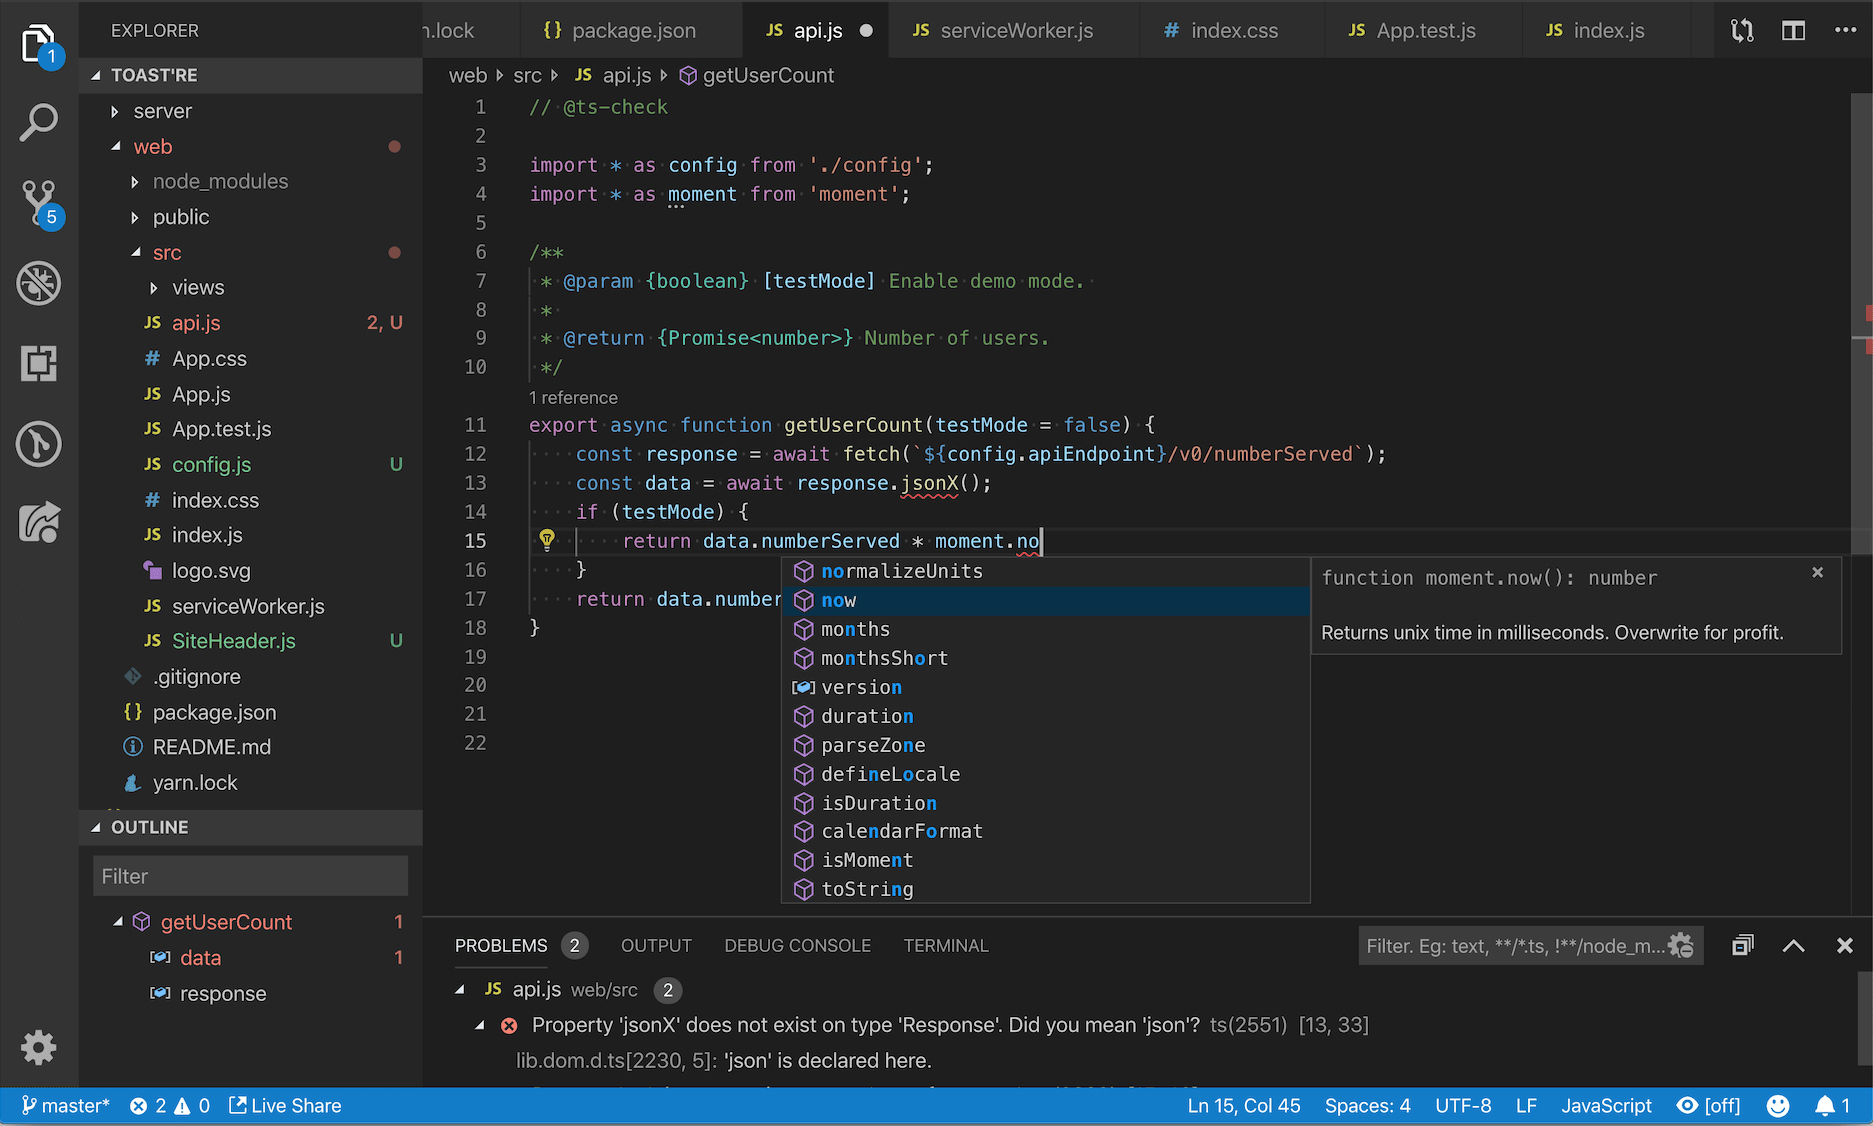
Basic Interface
Upon opening VSCode, you'll see a clean and intuitive interface. The main areas include the sidebar on the left, the editor area in the center, and the status bar/terminal at the bottom.
Example of how VSCode looks with the main areas:
Extensions
VSCode is extensible, allowing you to enhance its functionality through extensions. Some popular extensions include language support, themes, and tools. To install extensions:
- Click on the Extensions icon in the sidebar (or press Ctrl+Shift+X).
- Search for the desired extension.
- Click "Install" to install the extension.
Recommended Extensions
The following VSCode extensions are recommended for most of our projects:
- Prettier: For code formatting
- ESLint: For code linting and static analysis
- EditorConfig: To maintain consistent coding styles across different editors
- Live Preview: For quickly viewing rendered HTML files without needing to start up a server
- Better Nunjucks: For additional Nunjucks syntax highlighting (note: you may need to adjust settings to achieve this)
- vscode-pdf: Simple helper extension for viewing PDFs within your IDE
Integrated Terminal
VSCode comes with an integrated terminal that allows you to run commands without leaving the editor. To open the terminal click on "Terminal" then "New Terminal".
Code Editing
Auto-Completion
VSCode provides intelligent auto-completion suggestions as you type.
Formatting
Use Shift+Alt+F to format code.
Find and Replace
Press Ctrl+F for find, Ctrl+H for replace.
Version Control
VSCode has built-in support for version control systems like Git. If your project is not already a Git repository, initialize one by running 'git init' in your project root directory.
Debugging
VSCode provides a powerful debugger for various languages. To set breakpoints and debug your code click "Run" then "Start Debugging" or Ctrl+Shift+D
Custom Settings
VSCode is highly customizable, you can change your instance to suit your preferences:
- Click on "File" in the top menu and select "Preferences" > "Settings."
- Modify settings in the JSON file or use the graphical settings editor.
Resources
View the documentationjQuery
jQuery is a fast, small, and feature-rich JavaScript library. It simplifies HTML document traversal and manipulation, event handling, animation, and more.
It's become ubiquitous for JavaScript development because of it's simplification of syntax.
Including jQuery in Your Project
To use jQuery, you need to include it in your HTML file. You can download jQuery from the official website or use a Content Delivery Network (CDN). We use the CDN by including this code in our 'head' of our HTML files:
<script src="https://code.jquery.com/jquery-3.6.0.min.js"></script>
Basic jQuery Syntax
jQuery simplifies JavaScript code with a concise syntax. To select an HTML element using jQuery:
$(document).ready(function() {
  // Your jQuery code here
});
This ensures your code executes only when the DOM is fully loaded.
Selecting Elements
Use the $ symbol to select elements. For example, to select all paragraphs:
$(document).ready(function() {
  // Select all paragraphs and hide them
  $("p").hide();
});
Event Handling
jQuery simplifies event handling. To execute code when a button is clicked:
$(document).ready(function() {
  // Hide the paragraph when the button is clicked
  $("button").click(function() {
    $("p").hide();
  });
});
Animation
jQuery makes it easy to add animations. For example, to fade out a div:
$(document).ready(function() {
  // Fade out the div over 2 seconds
  $("div").fadeOut(2000);
});
AJAX with jQuery
jQuery simplifies AJAX requests. To load content into a div:
$(document).ready(function() {
  // Load content into the div
  $("#result").load("content.html");
});
Resources
View the documentationnpm (Node Package Manager)
npm (Node Package Manager) is a package manager for JavaScript, and it's used to discover, share, and manage code packages and dependencies. It comes bundled with Node.js, making it an integral part of the JavaScript development ecosystem.
Installing Node.js and npm
Before using npm, you need to have Node.js installed on your machine (this will need to be done by Technology Solutions).
Once installed, npm is included automatically. You can verify the installation by running:
node -v
npm -v
Creating a package.json File
A package.json file is a manifest for your project, and it includes metadata about your project, such as the project's name, version, and dependencies. You can create a package.json file using:
npm init
Follow the prompts to provide information about your project. If you want to skip the prompts and use default values, you can use:
Installing Packages
npm allows you to easily install packages and manage dependencies for your project. To install a package, run:
# (remove '')
npm install 'package-name'
For example:
npm install nunjucks
Managing Dependencies
You can manage project dependencies by adding, updating, or removing packages. Here are some common commands:
Adding a Dependency:
# (remove '')
npm install 'package-name' --save
Adding a Development Dependency:
# (remove '')
npm install 'package-name' --save-dev
Updating Dependencies:
npm update
Removing a Dependency:
# (remove '')
npm uninstall 'package-name'
Scripts in 'package.json'
You can define custom scripts in your 'package.json' file. For example, in the codebase for this project I have a script that allows me to run my main JavaScript file through a simple 'start' command:
"scripts": {
    "test": "test",
    "start": "node --trace-warnings --experimental-modules app/app.js"
}
Then I use the script by using it in my terminal:
npm start
Global vs. Local Packages
Packages can be installed globally or locally. Global packages are installed system-wide and can be used in any project, while local packages are installed in the current project's 'node_modules' directory (we normally keep this directory in a project's .gitignore file so it doesn't get added to GitHub, be aware you may need to install packages ).
Installing a Global Package:
npm install -g 'package-name'
Installing a Local Package:
npm install 'package-name'
Resources
View the documentationTailwind CSS
Tailwind CSS is a utility-first CSS framework that makes it easy to design and build modern and responsive user interfaces. It's become particularly popular with making SaaS builds.
Tailwind is similar to Bootstrap in that it offers a frontend framework, but it differs from Bootstrap in that it doesn't really come with a component library - rather, it uses utility classes.
Installation
You can install Tailwind as a node package, but so far we have only used it via CDN like Bootstrap. This could change in the future - look out for this change.
// insert this into the  of your HTML file
<script src="https://cdn.tailwindcss.com"></script>
Basic Usage
Once Tailwind CSS is installed, you can start using its utility classes in your HTML or other templating language. Include the generated CSS file in your project.
Customization
Tailwind CSS is highly customizable. You can configure the framework to include or exclude specific utility classes, define custom colors, fonts, and more in the configuration file (tailwind.config.js).
Responsive Design
Tailwind CSS makes it easy to create responsive designs using its responsive utility classes. Adjust the layout and styling based on different screen sizes.
<div class="lg:flex lg:justify-between">
    // Content for large screens
</div>
Explore Components
While Tailwind doesn't come with the kind of library like Bootstrap does, it does offer some components as standard (not all of these are free, you'll have to check).
There are other libraries out there like Flowbite that we use that offers more options for free components made with Tailwind.
Resources
Explore additional resources and advanced features in the official Tailwind CSS documentation.
View the documentation View FlowbiteGitHub
GitHub is a web-based platform that provides tools for version control and collaborative software development. It allows individuals and teams of developers to work on projects together, track changes, and manage code repositories. Here are some key concepts and features of GitHub:
View the Sport Wales GitHub pageMake sure to create a GitHub account if you don't have one already, and tell your colleagues so you can be added to the Sport Wales organisational page.
Version Control
GitHub uses Git, a distributed version control system. Version control allows developers to track changes in their code over time, revert to previous versions if needed, and collaborate seamlessly.
Repositories
A repository (repo) is a container for a project. It holds all the files, folders, and documentation related to a project. Repositories can be public, allowing anyone to view them, or private, restricting access to authorized collaborators.
Branches
Branches in GitHub are separate lines of development that allow developers to work on specific features or fixes without affecting the main codebase. Branches can be merged back into the main branch when the changes are ready.
Commits
A commit is a snapshot of the code at a specific point in time. Developers create commits to save changes and provide a meaningful description of what was done. Commits help in tracking the history of the project.
Pull Requests
Pull requests (PRs) are proposals for changes. When working in branches, developers submit pull requests to merge their changes into the main branch. This facilitates code review and collaboration among team members.
Issues
Issues are used to track tasks, enhancements, bugs, or any other kind of discussion related to the project. They can be linked to pull requests, providing a way to manage and discuss work in progress.
Collaboration
GitHub is designed to facilitate collaboration among developers. It provides features like code review, commenting, and discussions within the context of the code. Multiple developers can contribute to a project simultaneously.
GitHub Actions
GitHub Actions allow developers to automate workflows, such as building, testing, and deploying applications directly from the repository. This helps in maintaining code quality and streamlining development processes.
Wikis and Documentation
GitHub provides tools for creating wikis and documentation within repositories. This is useful for maintaining project documentation, guidelines, and other essential information.
Read the documentationGitHub has become a fundamental platform for open-source and private software development, fostering collaboration, transparency, and efficient project management. It is widely used by individual developers, teams, and organizations across the globe.
The dreaded merge conflict
At some point, you will encounter the dreaded merge conflict. It happens to us all. A merge conflict is when there are two versions of the same document that have conflicting changes within them, it usually occurs when someone has committed a change on an older version of the project.
Remain calm, and resolve the conflict (it's usually easiest to do this within the Git tab on VSCode).
There are lots of resources out there to help, if you come across one let your colleagues know and we can resolve it together.
Git
Git is the distributed version control system that enables efficient and collaborative software development that we use at Sport Wales. Here's a guide to help you get started with Git.
Installing Git
To use Git, you need to install it on your machine (this will need to be done by Technology Solutions, raise a ticket with them.)
Basic Git Commands
Learn essential Git commands to start managing your projects and collaborating with others.
It can be useful to be logged into your GitHub account on your VSCode so accessing repositories is easier.
These commands are run in the command line/terminal.
# (remove '')

# Initialize a new Git repository
git init

# Clone a repository from a URL
git clone 'repository-url'

# Check the status of your changes
git status

# Stage changes for commit
git add .

# Commit changes
git commit -m "Your commit message"

# Push changes to a remote repository
git push origin 'branch-name'
Branching in Git
Understand how to create and manage branches to work on different features or fixes simultaneously.
# (remove '')

# Create a new branch
git branch 'branch-name'

# Switch to a branch
git checkout 'branch-name'

# Merge branches
git merge 'branch-name'
Collaboration with Git
Collaborate with others using Git. Learn about pull requests, fetching changes, and resolving conflicts.
# Fetch changes from a remote repository
git fetch

# Create a pull request
# (For platforms like GitHub, GitLab, or Bitbucket)
Resources
There are loads more git commands out there, and it's worth taking the time to research what you can do with git.
Read the documentationHow to use this page
This portion of the website is intended for technicians. It offers best practice, guides, and resources.
Begin by selecting the menu item of any topic you wish to explore.
Nunjucks
It's a JavaScript-based templating language that speeds up production of HTML pages. Using Nunjucks gives us the advantage of faster production and only changing repeated HTML elements once.
You can view the documentation for Nunjucks online and templating guides. The documentation for jinja2 (which Nunjucks is closely based on) is also helpful. Below has set up instructions:
Requirements
1. Node package manager (npm) - Gitpod should already have npm. If you run into trouble, visit the npm documentation for installation guidance.
2. Nunjucks node package- There are alternative ways of installing Nunjucks, but this is the easiest (see step 1 below).
Steps
Install Nunjucks using Node (after making sure you have NodeJS installed)
In your IDE's terminal, run this command to install nunjucks:
npm install nunjucks
This will install the necessary packages which will create a create a new directory in your root, 'node_modules', it's best practice to add this directory to your .gitignore file for commits (but make sure you keep a copy for your own local development). Two .json files will also be created - keep these in your directory so developers can see what our dependencies are.
Create a templates directory at your root and a base.njk file inside
This file (templates/base.njk) will function as our base template from which all other templates will 'extend'. Here is an example of a base.njk file:
<!DOCTYPE html>
<html lang="en">
<head>
    <meta charset="UTF-8">
    <meta name="viewport" content="width=device-width, initial-scale=1.0">
    <!-- Add your common meta tags, stylesheets, and scripts here -->
    <!-- pageTitle is a variable that you can use to set the title of pages -->
    <title>{{ pageTitle }}</title>
</head>
<body>
    <header>
        <!-- Your header content here -->
    </header>
    <main>

        <!-- block 'content' is what we will 'fill' with our other templates -->
        {% block content %}{% endblock %}

    </main>
    <footer>
        <!-- Your footer content here -->
    </footer>
</body>
</html>
Create child templates
So for each page, e.g. funding, booking, etc, we'll create Nunjuck templates using the .njk file extension. These templates extend the base template. For example, this could be index.njk:
{% extends "base.njk" %}

{% block content %}
    Welcome to Sport Wales Portal
    This is the home page!
{% endblock %}
Render the templates
Create a JavaScript file, the example below is a simplified and expanded version of what is currently in ./js/nunjucks.js file:
const nunjucks = require('nunjucks');
const fs = require('fs');

// Configure Nunjucks to load templates from a directory (adjust this path)
nunjucks.configure('./templates', { autoescape: true });

// Define variables for your templates
const context = {
    pageTitle: 'Sport Wales Portal',
    // Add any other variables needed for your templates
};

// Render the template (replace 'index.njk' with the desired page)
const output = nunjucks.render('index.njk', context);

// Write the rendered HTML to a file or insert it into your web page
fs.writeFileSync('output.html', output);
Run the JavaScript file
Simply run the nunjucks.js file to run the file and write the HTML pages:
node js/nunjucks.js
Top tips
You'll find that in your IDE you may lose syntax highlighting in your .njk compared to your regular HTML files. There is a VSCode extension called 'Nunjucks Template' that fix this for you.
Documentation
Read the documentationBootstrap
Bootstrap is a frontend toolkit that helps making builing websites easier. It offers a pre-built grid system and components library.
It's widely used by frontend developers and is easy to use out of the box.
Installation guide
There are a couple of different ways to access Bootstrap, but the one we use is via CDN.
Include the CSS and JS CDNs in your HTML files to access Bootstrap:
<!DOCTYPE html>
<html lang="en">
    <head>
        <meta charset="utf-8">
        <meta name="viewport" content="width=device-width, initial-scale=1">
        <title>Bootstrap demo</title>
        <!-- CSS CDN: -->
        <link
        href="https://cdn.jsdelivr.net/npm/bootstrap@5.3.2/dist/css/bootstrap.min.css"
        rel="stylesheet"
        integrity="sha384-T3c6CoIi6uLrA9TneNEoa7RxnatzjcDSCmG1MXxSR1GAsXEV/Dwwykc2MPK8M2HN"
        crossorigin="anonymous">
    </head>
    <body>
        <h1>Hello, world!</h1>
        <!-- JavaScript CDN: -->
        <script
        src="https://cdn.jsdelivr.net/npm/bootstrap@5.3.2/dist/js/bootstrap.bundle.min.js"
        integrity="sha384-C6RzsynM9kWDrMNeT87bh95OGNyZPhcTNXj1NW7RuBCsyN/o0jlpcV8Qyq46cDfL"
        crossorigin="anonymous"></script>
    </body>
</html>
Usage
Once you include your CDNs in your HTML you will notice your pages are automatically styled.
Bootstrap works by using classes in HTML elements.
View the components libraryBootstrap's grid system is particularly helpful. It offers way to organise your page's content by columns and rows in a simple way to understand.
View the grid system and how to use it.
Documentation
Read the documentationBranding Guidelines
Primary Logo Usage
The Sport Wales logo is designed using a custom-made typeface. The primary form should appear on a flat-colored background. For white backgrounds or images, a secondary black and white version may be used.
Logo Variations
- Black and White: Can be used in cases of technical or budgetary constraints.
- Clear Zone: Preserve the clear zone around the logos equal to the height of the letterforms.
Size and Spacing
- Recommended size on an A4 document: 40mm wide.
- Minimum spacing on web pages: 30 pixels between the logo and other elements.
Restrictions
- Do not stretch, skew, or distort the logo.
- Proportions must always remain constant.
- Do not use a different typeface to recreate the logo.
Our Colors
- RGB: 227, 36, 52
- Hex: #E32434
- Pantone: 192C
- RGB: 22, 75, 100
- Hex: #164B64
- Pantone: 2210C
- RGB: 77, 17, 78
- Hex: #F6B207
- Pantone: 1365C
- RGB: 38, 86, 163
- Hex: #807E8B
- Pantone: 444C
Primary Typography
Fonts
Black Italic: Titles & Subtitles
Black Italic: Titles & Subtitles (Secondary Typeface)
Online Guidelines
- For online content, use font size 35 for titles and size 14 for body text.
- Body copy, should not exceed 85% - 95% black.=
Usage Guidelines
- In printed documents, use font size 30 for page titles in any Sport Wales color.
- Section titles, should be font size 14.
- Body text, should appear between sizes 10 and 14 points, not exceeding 85% - 95% black.
Using Figma
Figma is a powerful cloud-based design tool that simplifies the collaborative design process. Whether you're working on user interfaces, prototypes, or design systems, Figma provides a seamless platform for creating, sharing, and iterating on designs in real-time.
In this documentation, we'll explore key aspects of Figma, from creating projects to efficient navigation, collaboration features, and sharing design assets with your team and clients.
Creating a Figma Account:
When creating a Figma account, please ensure to use your Sport Wales email account.
Creating a New Project or File:
To create a new project in Figma, follow these steps:
- Log in to your Figma account.
- Click on the "+" icon to start a new file.
- Choose from templates or start from scratch.
Navigating Figma Efficiently:
Efficient navigation in Figma involves the following:
- Toolbar: Use the toolbar for various actions.
- Layers and Properties Panel: Explore the layers and properties panel for elements.
- Keyboard Shortcuts: Utilize keyboard shortcuts for quick commands.
Key Features and Capabilities:
Figma is a collaborative design tool with the following key features:
- Creating, prototyping, and sharing designs in real-time.
- Operating in the cloud, allowing seamless collaboration and access from different devices.
Collaboration in Figma:
Figma enables collaboration through Teams and Projects:
- Teams: Groups of users.
- Projects: Containers for files.
- Team members can work simultaneously in the same file.
Simultaneous Work in Figma:
Figma excels in enabling teams to collaborate seamlessly by allowing multiple users to work concurrently on the same design file. This real-time collaboration feature transforms the design process by facilitating:
- Instant Updates: Any change made by one team member is instantly visible to others. This eliminates version control issues and ensures everyone is on the same page.
- Efficient Communication: Designers can communicate within the context of the design, leaving comments and suggestions directly on the elements, frames, or prototypes.
Sharing Designs:
Designs in Figma can be shared using the following steps:
- Click on the "Share" button.
- Invite team members or generate shareable links for clients.
- Adjust permissions for viewing or editing access.
Our Teams Folder:
Our Teams folder is named 'Sport Wales X Cardiff Met Digital Dream Team'. In this folder, we organize all our current projects, designs, workflows, and resources.
An invitation will be sent to join the Teams folder if not already received.
Design System
Coding Conventions
This is a general best practice guide to how we write and style our codebases for projects.
Language
Use British English in your code, comments, and documentation.
Indentation
Use 2 spaces for indentation.
Ensure consistent indentation style across the project.
Line endings
Use LF (Line Feed) line endings.
Trailing whitespace
Remove trailing whitespace from your code files.
Exception: In Markdown files, you can leave trailing whitespace for better control of line breaks.
Recommended Extensions
The following VSCode extensions are recommended for most of our projects:
- Prettier: For code formatting
- ESLint: For code linting and static analysis
- EditorConfig: To maintain consistent coding styles across different editors
- Live Preview: For quickly viewing rendered HTML files without needing to start up a server
- Better Nunjucks: For additional Nunjucks syntax highlighting (note: you may need to adjust settings to achieve this)
- vscode-pdf: Simple helper extension for viewing PDFs within your IDE
Setting up your Development Environment
1. Clone the project repository from GitHub.
2. Install Node.js and npm if not already installed.
3. Install Visual Studio Code if not already installed.
4. Install the recommended extensions mentioned in the section above.
5. Open the project folder in Visual Studio Code.
6. Ensure that the .editorconfig file and workspace-specific settings in .vscode/settings.json are being respected by your editor.
Version control
Use Git for version control.
Like rain on the one day you've forgotten an umbrella, merge conflicts will happen. Keep calm and let your colleagues know and we'll work together to sort it.
Commit your changes often, and regularly check the status of your git history.
Before working on a repository, check the git status to see whether you need to pull any changes or not.
Keep the .editorconfig, .vscode/settings.json, and other configuration files under version control to maintain consistency across the team.
Documentation
Keep project documentation up to date in the docs/ directory of your project.
Use Markdown for documentation.
Document code changes, project structure, and usage instructions for developers and users.
Code Reviews
Before merging code, ensure it adheres to the coding conventions and passes linting and formatting checks.
Conduct code reviews to maintain code quality and consistency.
Testing
Write unit tests and integration tests for your code.
Ensure that tests are passing before merging code changes.
Security
Follow security best practices to protect the project and its users.
Make sure to follow all downloading and installation procedure as set by Technology Solutions within Sport Wales.
Licensing
Check the project's licensing terms and ensure compliance with open-source licenses.
README.md
A 'README.md' file is a document written in a Markdown format that serves as the introductory and instructional document for software projects.
It's good practice to place this at the root of the project's repository on GitHub.
We will include a README.md file in our projects so that future developers will know why a project was created, any installation information, and how the project was intended to be run.
Template
You can copy and paste this markdown template into your project:
# Title of project
Description of project
## Technologies
Brief description of the technology used, e.g. React/Nunjucks/etc
## Installation
If this project needs to be installed, place documentation here
## Dependencies
- List any and all dependencies (e.g. packages, third-party software) that the project relies upon here
## Deployment
If the project is deployed, place the URL here
## License
[](https://opensource.org/licenses/MIT)
Alternatively, the template is available on GitHub.
LICENSE
A LICENSE file is a document at the root of your repository that communicates the terms under which others can use, modify, and distribute your code.
At Sport Wales, all of our projects use the MIT License which is a permissive open-source license that allows other users to do anything they like with the code, as long as they include the original copyright and license notice in any copy or portion of the software.
Following the example of the Government Digital Service, we use this license as it allows with our principles of openness and collaboration.
Template
You can copy and paste this markdown template into your project:
MIT License

Copyright (c) 2024 Sport Wales

Permission is hereby granted, free of charge, to any person obtaining a copy
of this software and associated documentation files (the "Software"), to deal
in the Software without restriction, including without limitation the rights
to use, copy, modify, merge, publish, distribute, sublicense, and/or sell
copies of the Software, and to permit persons to whom the Software is
furnished to do so, subject to the following conditions:

The above copyright notice and this permission notice shall be included in all
copies or substantial portions of the Software.

THE SOFTWARE IS PROVIDED "AS IS", WITHOUT WARRANTY OF ANY KIND, EXPRESS OR
IMPLIED, INCLUDING BUT NOT LIMITED TO THE WARRANTIES OF MERCHANTABILITY,
FITNESS FOR A PARTICULAR PURPOSE AND NONINFRINGEMENT. IN NO EVENT SHALL THE
AUTHORS OR COPYRIGHT HOLDERS BE LIABLE FOR ANY CLAIM, DAMAGES OR OTHER
LIABILITY, WHETHER IN AN ACTION OF CONTRACT, TORT OR OTHERWISE, ARISING FROM,
OUT OF OR IN CONNECTION WITH THE SOFTWARE OR THE USE OR OTHER DEALINGS IN THE
SOFTWARE.
Alternatively, the template is available on GitHub.